To add a transition in Alight Motion, start by opening the app and selecting your project. Locate the layers between which you want to add the transition. Tap on the layer you wish to transition from, then choose the “Effects” option. Scroll through the available effects until you find a transition you like. Apply the transition effect to the selected layer. Adjust the duration and properties to fit your project’s needs. That’s it! You now know how to add transition in Alight Motion.
Table of Contents
- How to Add Transition in Alight Motion
- Frequently Asked Questions
- Final Thoughts
How to Add Transition in Alight Motion
Adding transitions can really make your videos pop and keep viewers engaged. Alight Motion is a powerful tool for video editing that allows you to create stunning transitions with ease. However, if you’ve ever wondered, ‘Why is my Alight Motion lagging?‘ you’re not alone. Whether you are new to the app or looking to expand your skills, this detailed guide will walk you through the process step-by-step.
Understanding Alight Motion
Alight Motion is a versatile app available on both Android and iOS platforms. It offers a wide range of features for creating animations, visual effects, and transitions. Before we delve into adding transitions, it’s crucial to understand the basics of the app.
Interface Overview
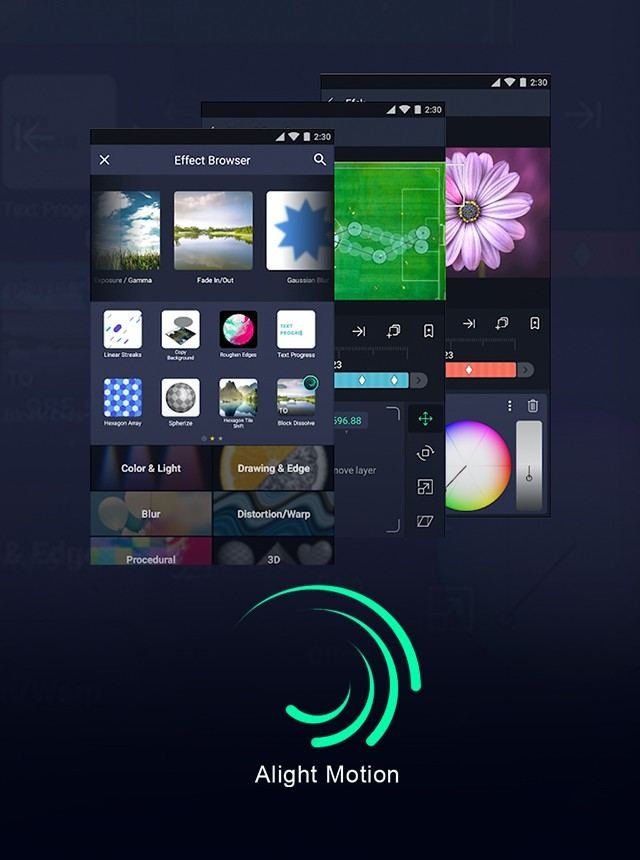
The Alight Motion app has a user-friendly interface that includes:
- Timeline: This is where you can see and manage your layers and edits.
- Layer Panel: Here you can add, remove, and edit layers. Each layer can be an image, video, or audio track.
- Tools and Effects: This section includes the tools and effects you can apply to your layers, such as opacity, blending modes, and more.
- Preview Window: This allows you to see your edits in real-time.
Getting familiar with these elements will help you navigate the app more efficiently.
Starting a New Project
To create a new project:
- Open Alight Motion.
- Tap on the “+” button at the bottom of the screen.
- Select your desired resolution, frame rate, and background color.
- Tap “Create Project” to start.
Now you have a blank canvas to start working on your video.
Importing Media
You’ll need some media to add transitions between. To import media:
- Tap on the “+” button in the Layer Panel.
- Select the type of media you want to import (Image, Video, or Audio).
- Choose the file from your device.
- The media will be added as a new layer in the timeline.
You can import multiple files and arrange them in the order you want them to appear in your video.
Adding Basic Transitions
Let’s start with basic transitions. Here’s how to do it:
Adding Fade In/Out Transition
- Select the layer you want to add the transition to.
- Tap on the “Effects” button at the bottom of the screen.
- Choose “Opacity” from the list of effects.
- Move the playhead to the start of the clip.
- Set the opacity to 0%.
- Move the playhead a few frames ahead and set the opacity to 100%.
- To create a fade-out effect, move to the end of the clip and set the opacity to 0% a few frames before the end.
Adding Crossfade Transition
- Place two video clips next to each other on the timeline.
- Overlap the end of the first clip with the start of the second clip.
- Select the first clip and add an Opacity effect.
- Set the opacity to 0% at the point where the two clips overlap.
- Set the opacity to 100% just before the overlap starts.
- Repeat the same for the second clip.
This will create a smooth crossfade transition between the two clips.
Advanced Transitions
Once you’re comfortable with basic transitions, you can try more complex ones. Here’s how:
Adding Slide Transition
- Position the clips you wish to transition between on the timeline.
- Select the first clip and tap on the “Effects” button.
- Choose “Move & Transform” from the list.
- Move the playhead to the start of the transition.
- Set the position to be off the screen to the left.
- Move the playhead to the end of the transition and set the position to be centered on the screen.
- Repeat these steps for the second clip, but move it from the right side of the screen to the center.
Adding Zoom Transition
- Import and arrange your clips on the timeline.
- Select the first clip and go to the “Effects” menu.
- Choose “Scale” from the Move & Transform section.
- Move the playhead to the start of the transition.
- Set the scale value to be smaller than 100% (e.g., 70%).
- Move the playhead to the end of the transition and set the scale to 100%.
- Repeat the same for the second clip, but move it from 120% to 100%.
Using Keyframes
Keyframes are essential for creating smooth transitions. Here’s a breakdown:
What Are Keyframes?
Keyframes mark the start and end points of an effect. By adding multiple keyframes, you can create complex transitions.
Adding Keyframes
- Select a layer you want to animate.
- Tap on the “Keyframe” icon in the timeline.
- Move the playhead to where you want the effect to start.
- Add a keyframe by tapping the “+” button.
- Move the playhead to where you want the effect to end and add another keyframe.
- Adjust the properties (like position, opacity, scale) between these keyframes.
Using Pre-made Transition Effects
Alight Motion offers pre-made transition effects that can save you time:
Applying Pre-made Effects
- Select the layer you want to add the transition to.
- Tap on the “Effects” button.
- Choose “Preset” from the list of effects.
- Browse through the available transition presets and select one.
- Adjust the duration of the transition by dragging the edges of the effect on the timeline.
Customizing Pre-made Effects
You can further customize these pre-made effects:
- Tap on the effect layer in the timeline.
- Adjust the properties like opacity, position, and scale using the tools provided.
- Add keyframes if you want more control over the transition.
Tips and Tricks for Smooth Transitions
To create professional-looking transitions, consider the following tips:
Match Transitions to Video Content
Ensure that your transitions match the mood and style of your video. For example:
- Use fast transitions for action-packed scenes.
- Opt for smooth transitions for serene and calm scenes.
Keep It Simple
Overusing transitions can distract viewers. Stick to a few well-chosen transitions to keep your video engaging.
Use Motion Blur
Adding motion blur can make your transitions look smoother:
- Select the layer with the transition.
- Go to the “Effects” menu.
- Choose “Motion Blur” and adjust the settings to your liking.
Exporting Your Video
After adding your transitions, it’s time to export your video:
- Tap on the “Export” button at the top right corner of the screen.
- Select your desired resolution and format.
- Tap “Export” and wait for the process to complete.
You can now share your video with stunning transitions on your favorite platforms.
Troubleshooting Common Issues
Sometimes, you might encounter issues while adding transitions:
Transition Not Smooth
- Ensure that you have enough frames between keyframes.
- Check if your device has enough processing power.
- Try reducing the resolution or frame rate.
Effect Not Applying
- Make sure you have selected the correct layer.
- Ensure that keyframes are correctly placed.
- Restart the app if the issue persists.
By following these steps and tips, you can create amazing transitions in Alight Motion, adding a professional touch to your videos. Keep practicing and experimenting with different effects to find your unique style.
Frequently Asked Questions
How do I customize the duration of a transition in Alight Motion?
To customize the duration of a transition in Alight Motion, after applying the transition effect, select the transition in the timeline. You will see handles at the beginning and end of the transition. Drag these handles to adjust the duration. You can also go into the transition settings to manually input the exact duration you want for more precision.
Can I preview a transition before applying it in Alight Motion?
Yes, you can preview a transition before fully applying it in Alight Motion. When you choose a transition effect from the “Transition” category, tap on the preview icon (usually a play button) to see how the transition will look between your clips. This allows you to make adjustments before finalizing the effect.
Is it possible to add multiple transitions to a single clip in Alight Motion?
Yes, you can add multiple transitions to a single clip in Alight Motion. To do this, select the clip and add your first transition effect. Once you’ve customized it, you can add another transition by repeating the process. This allows you to layer different transitions to create a unique effect tailored to your project.
Final Thoughts
To add transition in Alight Motion, start by selecting the clip where you want to insert the transition. Tap the “+” button, then choose “Add Effect” and navigate to “Transitions.” Adjust the settings to your preference, experimenting with different styles and durations to achieve the desired effect. Preview your work to ensure smooth transitions. Practicing these steps will help you seamlessly add transition in Alight Motion, enhancing your video edits.


