Editing videos in Alight Motion is easier than you might think. This powerful app offers a range of features that let you create stunning videos right from your mobile device. To get started, you just need to open the app, import your video clips, and explore the various tools available. From adding visual effects to synchronizing audio, Alight Motion has everything you need. Ready to dive into the details? Let’s explore the steps and tips on how to edit video in Alight Motion.
Table of Contents
How to Edit Video in Alight Motion
Editing videos on mobile devices has become extremely popular, and one standout app for this purpose is Alight Motion. Whether you’re looking to do basic edits or create complex animations, Alight Motion offers a robust set of tools that cater to both beginners and more advanced users. If you’re curious about how to Alight Motion APK mod download in Chrome browser, this guide will help you with that as well. In this blog post, we’ll explore how to edit videos in Alight Motion step by step, covering everything from the basics to advanced techniques.
Setting Up Your Project
Before diving into the actual editing, you need to set up your project correctly. Here’s how to do it:
Opening Alight Motion
1. First, download and install Alight Motion from the Google Play Store or Apple App Store if you haven’t already.
2. Launch the application by tapping the Alight Motion icon on your home screen.
Creating a New Project
1. Once the app is open, tap the “+” button to start a new project.
2. Give your project a meaningful name, especially if you plan to work on multiple projects.
3. Choose an aspect ratio that fits your video requirements. Common ratios are 16:9 for YouTube and Facebook, square 1:1 for Instagram, and 9:16 for TikTok or Instagram Stories.
4. Choose a frame rate. The standard for most videos is 30fps, but you might opt for 60fps if you’re editing action-packed footage.
5. Pick a resolution that suits your project. Full HD (1080p) is usually sufficient for most social media platforms.
Importing Media
Before you can edit, you need to import your media files into the project.
Adding Video Clips
1. Tap the ‘Media’ button.
2. Choose whether you want to import from your device’s storage, or another source like Google Drive.
3. Navigate to the folder where your video is stored, and select the video clip you wish to edit.
4. Tap ‘Import’ to add the video clip to your timeline.
Adding Photos and Audio
1. Follow the same steps as above, but choose photos from your gallery instead.
2. To add audio, click on the ‘Audio’ tab and then select from your device. You can also use sound effects or music tracks provided within the app.
Basic Editing Techniques
Once your media files are imported, it’s time to start editing.
Trimming and Cutting
1. Tap on the video clip in the timeline to select it.
2. Drag the ends of the clip to trim unwanted sections.
3. Position the playhead where you want to cut and tap the ‘Split’ button to divide the clip into two sections.
Rearranging Clips
1. Tap and hold the clip you wish to move.
2. Drag the clip to the desired position in the timeline and release it.
Adding Transitions
1. Tap the transition area between two clips.
2. Select from various transition effects like fade, slide, or wipe.
3. Customize the duration of the transition for a smooth flow.
Enhancing Your Video
To make your video more engaging, you can add effects, text, and animations.
Applying Effects
1. Tap on the clip you wish to enhance.
2. Tap on the ‘Effects’ button.
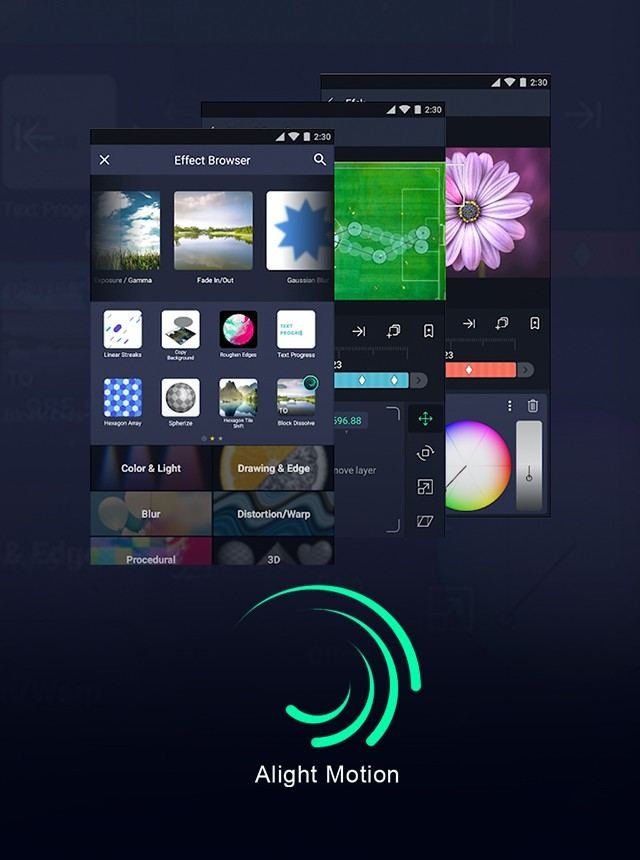
3. Browse through categories like ‘Color & Light’, ‘Blurs’, or ‘Distortion’.
4. Adjust the effect settings to your liking using the provided sliders and options.
5. Always preview the changes to see how they fit with the rest of the video.
Adding Text
1. Tap the ‘Text’ button.
2. Type in the text you want to appear.
3. Choose the font, color, size, and other text properties.
4. Drag the text box to position it on the video.
5. If needed, you can animate the text using keyframes.
Using Keyframes
Keyframes are essential for creating animations.
1. Tap on the clip you want to animate.
2. Tap the ‘Keyframe’ button.
3. Position the playhead, and tap the ‘+’ button to add a keyframe at the current attribute setting (like position, scale, opacity).
4. Move the playhead to another point in the timeline and adjust the attribute settings again. Another keyframe will automatically be created.
5. Use easing curves to make your animations smoother.
Advanced Editing Techniques
For those who want to take their editing to the next level, Alight Motion offers advanced tools.
Masking
Masking allows you to hide or reveal parts of a clip.
1. Choose the clip you want to mask.
2. Tap the ‘Mask’ button.
3. Select from shapes like rectangle, circle, or draw your own custom mask.
4. Resize and position the mask over the clip.
5. Add keyframes to animate the mask if needed.
Color Correction
Color correction can enhance the visual appeal of your video.
1. Tap on the clip for color correction.
2. Tap ‘Color & Light’.
3. Use settings like brightness, contrast, saturation, and hue to improve the clip’s color.
4. You can apply LUTs (Look-Up Tables) for advanced color grading.
Working with Multi-Layer Compositions
A powerful feature of Alight Motion is the ability to work with multi-layer compositions.
Adding Layers
1. Tap the ‘Layers’ button.
2. Tap the ‘+’ to add a new layer. Choose from options like media, shapes, text, or drawing.
3. Drag layers up or down to re-order them, affecting how they appear in your composition.
Blending Modes
Adjust how layers interact with each other using blending modes.
1. Tap on the layer you want to blend.
2. Tap the ‘Blending’ button.
3. Experiment with options like ‘Multiply’, ‘Screen’, or ‘Overlay’ to achieve different visual effects.
Exporting Your Project
Once you’re happy with your edits, it’s time to export your project.
1. Tap the ‘Export’ button in the top right corner.
2. Select the format in which you want to export (e.g., MP4, GIF).
3. Adjust the resolution and bitrate settings. Higher settings will produce better quality but result in larger file sizes.
4. Tap ‘Export’ and wait for the rendering process to complete.
5. Save the video to your device or share it directly to social media platforms.
With patience and practice, you’ll find that editing videos in Alight Motion can be both fun and rewarding. This guide should provide you with a solid foundation to start enhancing your videos.
Frequently Asked Questions
How do I add text to my video in Alight Motion?
To add text to your video in Alight Motion, follow these steps:
1. Open your project and select the layer button.
2. Choose the “Text” option.
3. Type your desired text in the text field.
4. Customize the font, size, color, and other options as needed.
5. Once you are satisfied with the customization, tap the checkmark to add the text to your video.
Can I use transitions between video clips in Alight Motion?
Yes, you can use transitions between video clips in Alight Motion. To do this:
1. Select the ‘Effects’ button within your project.
2. Choose “Transitions” from the list of effects.
3. Browse through the available transitions and select one.
4. Adjust the transition duration and settings as desired.
5. Apply the transition between your clips.
How do I import media into Alight Motion?
To import media into Alight Motion:
1. Open your project and tap the ‘+’ button.
2. Select “Media” from the options.
3. Choose the desired media file from your device’s storage.
4. The media will be imported into your project, and you can then drag and drop it onto the timeline.
Final Thoughts
Editing video in Alight Motion is straightforward and efficient. You start by importing your clips and organizing them on the timeline. Next, apply effects, transitions, and overlays to enhance visual appeal. Customize text and graphics to add a personalized touch. Finally, adjust color grading and audio settings for a polished finish. With these steps, you can effectively edit video in Alight Motion and create professional-quality content.


