Replacing a video in Alight Motion is simpler than you might think. Open your project and select the video layer you want to replace. Tap on the media icon and choose the new video from your library. Adjust the new video to fit the timeline and effects of the previous one. That’s it! You’ve successfully replaced a video in Alight Motion.
Table of Contents
How to Replace Video in Alight Motion
Replacing a video in Alight Motion can seem intimidating at first, but with a little guidance, you will be able to do it with ease. Alight Motion is a popular mobile application for video and animation editing, offering a robust set of tools for both beginners and professionals. While learning the basics is essential, some users might also be curious about how to hack Alight Motion. This blog post will walk you through each step in the process of replacing a video in Alight Motion, providing tips and tricks along the way. Let’s dive right in!
Getting Started with Alight Motion
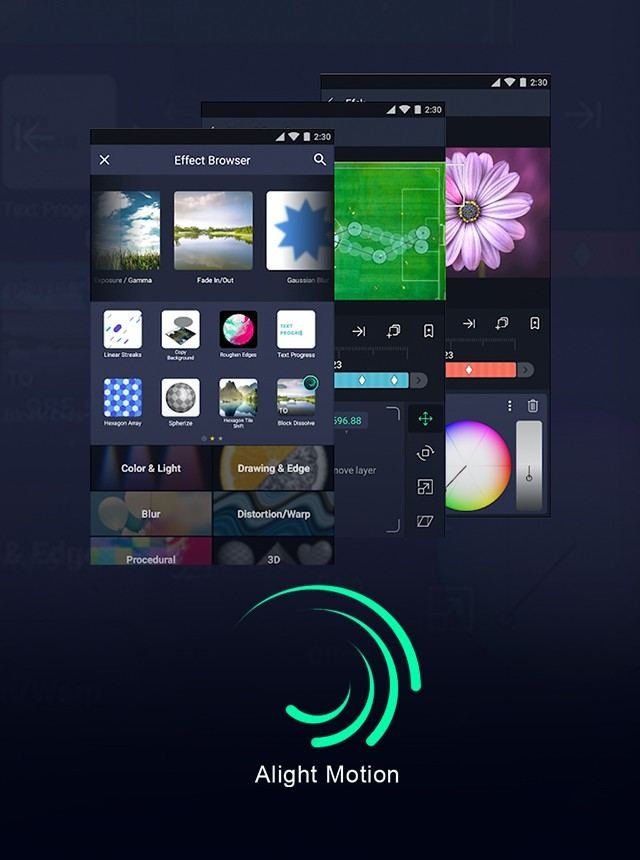
Before you can replace videos, you need to install Alight Motion and understand its basic interface. You can download Alight Motion from your app store and follow these steps for a quick setup:
- Open the app and sign up or sign in if you already have an account.
- Familiarize yourself with the interface. You’ll see options like ‘Projects,’ ‘New Project,’ and ‘Elements.’
- Create a new project by tapping on the ‘New Project’ button.
Once you have the app set up, it’s time to move on to replacing your video.
Importing Your Video
To replace a video, you first need to import it into your project. Here’s how you do it:
- Open your project in Alight Motion.
- Tap on the ‘+’ icon to add a new layer.
- Select ‘Media’ from the list, which will open your gallery.
- Choose the video you want to replace.
- Once selected, the video will be imported into your project. You can adjust its size and position as needed.
Removing the Old Video
Now that your new video is imported, it’s time to remove the old one:
- Select the layer that contains the old video.
- Tap on the ‘Delete’ button or use the ‘Remove’ option from the layer settings.
- Ensure that the new video is properly placed in the timeline.
Adjusting the New Video
You might need to make some adjustments to your new video so that it fits well within the project. Here’s how:
- Select the new video layer.
- Use the ‘Transform’ options to scale, rotate, or move the video to the correct position.
- Adjust the duration of the video by dragging the edges in the timeline.
Adding Effects and Transitions
To make your video replacement seamless, consider adding some effects and transitions:
- Tap on ‘Effects’ and explore the various options that Alight Motion offers. You can add motion blur, color filters, and more.
- To add a transition, select the new video layer and then tap ‘Transitions.’ Choose from fade, dissolve, slide, or other options.
- Fine-tune the transition duration to make it look natural.
Synchronizing Audio
If your project includes audio, you might need to synchronize it with the new video:
- Select the audio layer in the timeline.
- Adjust the start and end points to match the new video’s timing.
- Use the ‘Volume’ settings to make sure the audio and video work well together.
Previewing and Exporting
Before finalizing your video replacement, it’s crucial to preview your project to ensure everything looks good:
- Tap on the ‘Play’ button to preview your video.
- Make any final adjustments to layers, effects, or transitions.
- Once you’re satisfied, tap on the ‘Export’ button.
- Choose your export settings, including resolution and format, and then export your video.
Tips and Tricks for Seamless Video Replacement
Here are some extra tips to help you achieve the best results:
- Consistent Lighting: Ensure that the old and new videos have similar lighting conditions for a seamless look.
- Match Aspect Ratios: Make sure the aspect ratio of the new video matches the old one.
- Use Keyframes: Keyframes can be very useful for fine-tuning movements and transitions.
- Save Frequently: Alight Motion can be resource-intensive, so save your project frequently to avoid losing your work.
Common Issues and How to Fix Them
Sometimes, you might run into issues while replacing videos. Here are some common problems and how to fix them:
Video Not Importing Correctly
If you face issues while importing the video, try the following steps:
- Check the video format. Alight Motion supports MP4, MOV, and other common formats.
- Ensure that your video file is not corrupted.
- Restart the app and try importing the video again.
Video and Audio Out of Sync
Synchronization issues can be frustrating. Here’s how to fix them:
- Double-check the timeline to ensure that the video and audio layers are aligned correctly.
- Use the ‘Time Stretch’ feature to match the video’s duration with the audio track.
- Preview your project frequently to catch any sync issues early.
Performance Issues
If your app is running slowly or crashing:
- Close other apps running in the background to free up resources.
- Lower the preview quality in the settings to improve performance.
- Clear the cache and temporary files in the app settings.
Advanced Techniques
For those looking to add more complexity, here are some advanced techniques:
Using Masks
Masks can help you blend the new video with other elements:
- Select the new video layer and tap on ‘Masks.’
- Choose a mask shape, such as a rectangle or ellipse.
- Adjust the size, position, and feathering of the mask for a seamless blend.
Layer Blending Modes
Blending modes can be used to combine videos in unique ways:
- Select the new video layer and tap on ‘Blending Mode.’
- Explore different modes like ‘Multiply,’ ‘Screen,’ and ‘Overlay’ for various effects.
- Adjust the opacity to achieve the desired look.
Green Screen
If you’re replacing a video shot on a green screen:
- Import the new background video or image.
- Select the green screen video layer and tap on ‘Chroma Key.’
- Adjust the settings to remove the green background and blend the layers.
By following these steps and tips, you’ll be able to replace videos in Alight Motion like a pro. Remember to experiment with different features to find what works best for your project. Happy editing!
Frequently Asked Questions
Is it possible to trim videos in Alight Motion before replacing them?
Yes, you can trim videos in Alight Motion before replacing them. To do this, select your video layer and use the trimming handles at the beginning and end of the video clip to adjust its length. You can also use the split tool to cut the video at specific points and delete unwanted sections.
How can I add a transition effect when replacing a video in Alight Motion?
To add a transition effect when replacing a video, first, make sure the new video is inserted in your timeline. Then, place it on a separate layer. Select the end of the first video and the beginning of the second video, then choose the transition effect you want from the “Effects” tab. Adjust the transition timing to your preference.
Are there specific video formats that work best for replacement in Alight Motion?
Alight Motion supports various video formats, but for the best experience, use common formats such as MP4 or MOV. Ensure your videos have a reasonable resolution and frame rate to avoid performance issues when editing.
Final Thoughts
In conclusion, replacing a video in Alight Motion is straightforward. Open your project and find the layer containing the video you want to replace. Tap on that layer and choose the option to replace the media. Select your new video, and it will take the place of the old one while retaining all your previous edits and effects. With these simple steps, you can efficiently manage and update your projects. Understanding how to replace video in Alight Motion can save you time and keep your content fresh.


